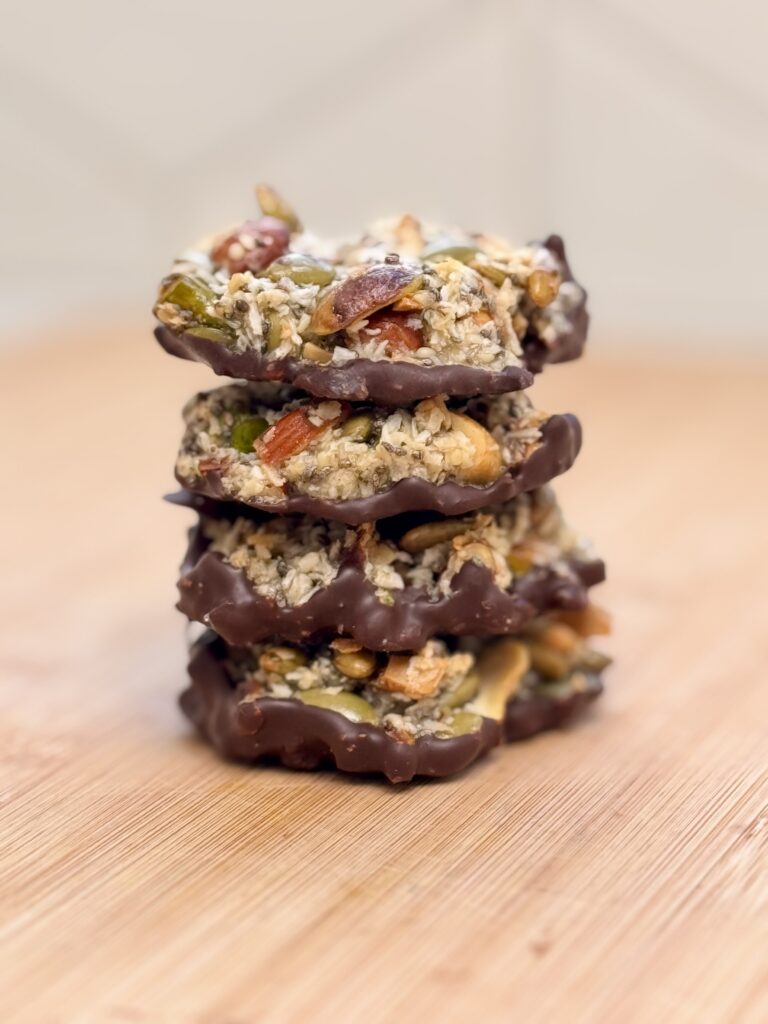
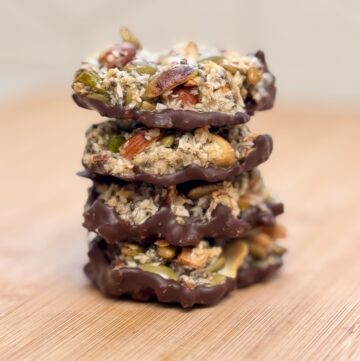
Indulge in these delicious and nutritious healthy nut and seed cookies. Packed with protein, healthy fats, fibre and vitamins, these cookies do not disappoint. They have a touch of sweetness from the honey and coconut and a dash of savoury from the dark chocolate.
A perfect snack for on the run or to enjoy with a hot cup of tea or coffee.
Let’s make these healthy cookies!
This is a very forgiving recipe. If you don’t have mixed nuts and have almonds instead, no problem! As long as the measurements are the same feel free to substitute ingredients. Try almonds and sunflower seeds, or macadamia nuts with cranberries instead of pumpkin seeds. The possibilities are endless for making your snacks both delicious and healthy!
Store your cookies in an airtight container in the fridge. They will keep for several weeks. If they aren’t all eaten up before that!
Missing some ingredients? Click HERE for a link to my Amazon store where you can find all of the healthy ingredients used in this recipe and more!
Healthy Nut & Seed Cookies
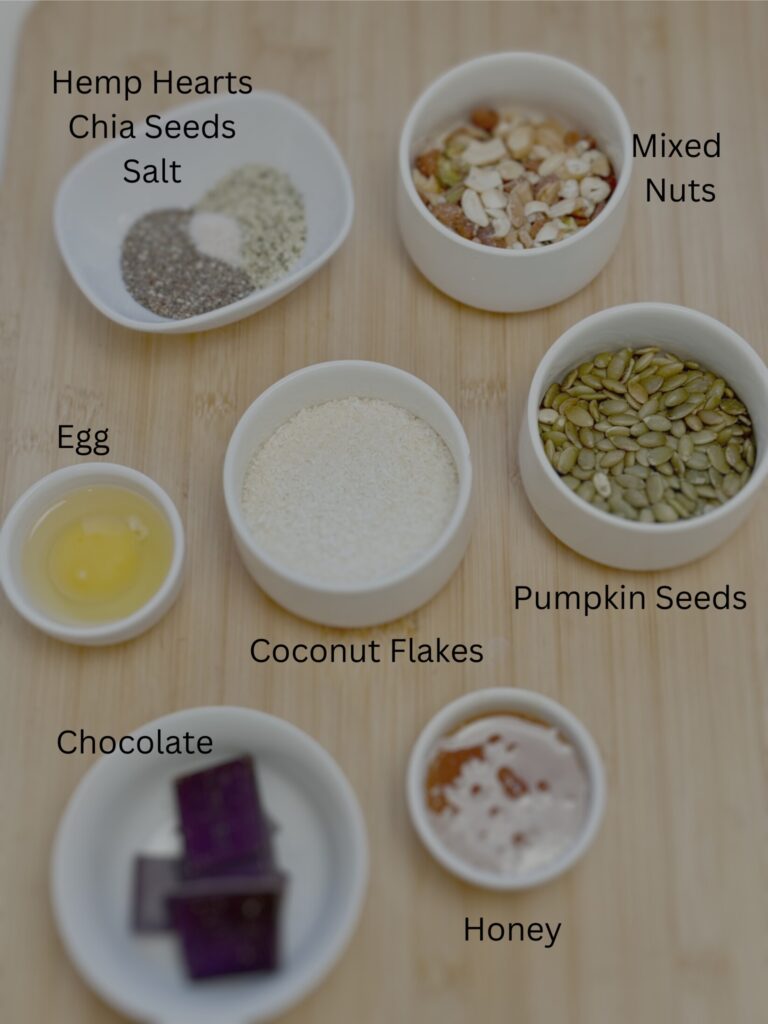
Ingredients
- 1/2 cup mixed nuts, chopped
- 1/2 cup pumpkin seeds
- 1/2 cup unsweetened coconut flakes
- 1/4 cup honey
- 1 egg white
- 1 tbsp hemp hearts
- 1 tbsp chia seeds
- 1/4 tsp sea salt
- 150 grams dark chocolate
Instructions
- Preheat oven to 350 degrees Fahrenheit
- In a large bowl add nuts, pumpkin seeds, coconut flakes, chia seeds and hemp hearts. Mix until combined
- Add egg white, honey and salt. Mix well so everything is coated evenly
- Line a baking sheet with parchment paper
- Using a cookie scoop or other utensil, spoon approx 1.5 tbsp of mixture onto the cookie sheet and flatten out slightly
- Bake for 15-20 minutes or until the cookies are starting to brown on the outside
- Let fully cool on baking sheet
- In a microwave safe bowl add the dark chocolate. Microwave in 30 second intervals until the chocolate is melted
- Place a cookie into the chocolate and submerge slightly. Use a fork to help take out the cookie. Place chocolate side UP on a cooling rack and sprinkle with sea salt (optional). Let chocolate fully harden
- Store in an airtight container in the fridge and enjoy!
Disclosure: This post contains affiliate links. If you make a purchase through these links, I may earn a small commission at no extra cost to you. I only recommend products I personally use and trust.